Wednesday, October 31, 2018

October 31st, 2018. Program: Clip Studio Paint. FINAL!!!!

So this month has been interesting, I started off by finishing an already started character design. I Tried out a new style of shading using gradients to add depth. I'd never tried this before and it worked really well.

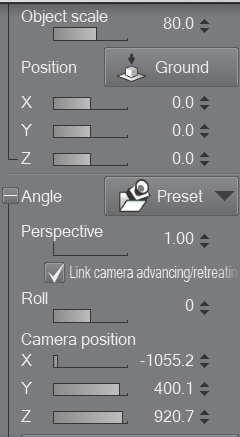
My next project in the month was a simple 3D model jumping animation. I created the key frames easily. However, when I put the frames in the animation folder I rasterized them, so when I went to create the sub frames I had to recreate the model pose then use that to get the sub frame. This took way too long, so I had to remake the animation, this time keeping a copy of the 3D model. It worked a lot better.

My next project was once again a 3D model animation, this time I did a character jumping and doing a spin kick. For this animation I decided that doing the key and sub frames seperately took way too long so I just did them together. During this animation I also discovered that instead of using the object position and camera perspective controls to keep the model position synced. I could instead use them to follow the models motion. Getting the timing of this animation was the most difficult part. The kick couldn't be too fast or too slow, and the run had to be smooth, I had to edit the timeline 6 times before it was good.


After the 3D animations I decided to do a 2D animation, based on the song Gravity by Defences. This project took the rest of my month with multiple posts being taken up by each process of the animation. These being the story board, rough sketch (for this part I used some 3D models to define some of the action frames), the good sketch, fine lining, coloring, and finally the shadows and highlights.
The story boarding was difficult due to the songs timing needing to be constantly synced up with the animation.
The rough sketch was simpler but I had trouble getting the action scenes right so I tried using 3D models to get the poses defined. This was a great success but it was difficult in it's own ways.
In the good sketch I defined the character expressions more, made things a bit smoother, added more in between frames, and got rid of the 3D models.
The fine line version I...

In between a couple of the 2D animation posts I did a post about an online webinar I had watched on the benefits of Clip Studio Paint. A lot of useful stuff was shown, such as how to use vector layers.

I got a lot of stuff done this month as well as learned a ton so I'm pretty happy, Next month I'll be trying to create my first web comic so that should be interesting.


Tuesday, October 23, 2018

October 23rd, 2018. Program: Clip Studio Paint

So once again working on the rough sketch.

I tried to use another 3D model in the animation, this time a model knife but I couldn't get it to move right with the character's had so I'll just have to draw it in later.

Monday, October 22, 2018

October 22nd, 2018. Program: Clip Studio Paint

So today I continued to work on the rough sketch.

I had some trouble with the sketch of the bigger group, I hadn't designed the characters before I started this project so coming up with the designs took a bit of time. I had to go back and add glasses to the main character because I forgot they had them. That consumed a bit of time.

I managed to get to the start of the fight scene, I couldn't get the poses right so I tried using 3D models. This has been a success so far but it takes a bit more time to do. I have to get the position right then the camera angle, plus I have to use multiple models which makes my computer a bit glitchy. I've kind of solved this by only editing one 3D model then rasterizing it, if I have to go back and fix the pose though it's not possible.

Friday, October 19, 2018

October 19th, 2018. Program: Clip Studio Paint

Last post I finished the story board version, so now I'm on to the rough sketch animation.

I created a new animation folder, I'll be drawing over the previous version with more detailed frames. For the starting bit with the city, I'll be keeping it the same for now. The main character turning was a little bit tricky to draw but not too bad, though I had to use the transform tool a lot.

This part is easier than the last because I'm just defining the motions more instead of creating them.

I've gotten about 17 seconds done for the rough sketch and that's where I'll have to stop for today.

Thursday, October 18, 2018

October 18th, 2018. Program: Clip Studio Paint

I have made a decision, I'm not doing the whole song. It's taking too long so I'll be going to around 50 seconds.

So yeah back to work on the story board. Since I'm still working on the fight I've been using the onion skin function a lot. This allows me to see previously drawn frames in the timeline, it's super useful and helps me keep the actions consistent.

The timing is once again the hardest part, but I'm getting better at it with practice.

I had to readjust a majority of the frames by a few tenths of a second, just to fix a time discrepancy.

The main character fighting in the animation has a shadow manipulation ability, showing that in the story board is extremely difficult. It mostly looks like a bunch of random scribbles


I've actually gotten to 55 seconds, so that's where I'll stop. I'll start on the rough sketch portion next post.

Wednesday, October 17, 2018

October 17th, 2018. Program: Clip Studio Paint

Taking a small break from the song animation, today I watched a webinar by Brian Allen about the benefits of Clip Studio Paint. I wanted to use today's blog to go over what I learned from it and show some of my experiments with that knowledge.

#1 Custom Menu
The custom menu, also known as the quick access menu. It lets you add tools into a custom menu for quick and easy access. I've actually been using this for a while.


#2 Reference Layers
This is pretty self explanatory, they are layers that Clip Studio Paint will refer to when creating a selection. I still had no idea how to use this, this video taught me that to get it to work that I had to edit the tool settings so that it would only select referred layers and not editing layers. To make a layer a reference layer you just select the layer and click the light house button in the layer panel.


#3 Transparency Painting
I love drawing with transparency, it makes things a lot more simple for me. With it, instead of editing the size and softness of the eraser tool, I can continue to use the tool I'm already working with.


Tuesday, October 16, 2018

October 16th, 2018. Program: Clip Studio Paint

So once again working on the story board.

With this next part of the animation there is a one character vs grunt army fight scene so story boarding that has been a hassle. I've watched a couple of anime fight scenes as a reference.

 I'm trying to just roughly sketch the character's motion around the field and get a rough sense of their fight style. Keeping the fight in sync with the songs beats.
The grunts are kind of horrible I'll have to fix them later, give them more motion. Currently they're pretty much standing dummys with guns.

I really like how I've done the camera angle changes in the animation, I've been trying to use less panning shots and scene cuts. I want it to be like the church fight in the first kingsmen movie. Of course currently it's nowhere near smooth, that's the point of the story board animation though.

I'm at around 36 seconds now so that's where I'll have to stop for the day.


Monday, October 15, 2018

October 15th, 2018. Program: Clip Studio Paint

So today I'm starting a new animation project, this time I'll be doing an animation based on this song.

For a 2D animation first I'll have to draw the story board version, then a sketch, then I draw a refined sketch, after that I do a fine line animation, then a colored one, lastly I add shades and highlights. Today I'll work on the story board.

this part of the process is pretty easy, all I'm doing is sketching the important bits of the animation. Key backgrounds, character positions, and motions.

I had a bit of trouble getting some of the anatomy right, I just used the transform tools to fix that though.

Getting the animation synced was a pain too. Every time I created a new frame I had to perfectly time it to the song. I have to do it right now or else it will be harder later.

In one of the frames I decided to use the drawing this animation is based on, I wanted it to be on a photo graph. To do this I copied and pasted the photo, then used the mesh transformation tool to mold the photo on to the right spot


I'm at about 26 seconds into the animation, but I'm out of time for today so I'll just continue to work on it tomorrow.

Friday, October 12, 2018

October 12th, 2018. Program: Clip Studio Paint

So I just placed all the frames in the timeline, I'm going to work with a frame rate of 10fps. currently I have placed all the frames 5 spaces apart this obviously is to fast so I'll be editing that.

I really like how the timeline works with Clip Studio Paint. All you need to do is draw the frames, place them in an animation folder, and then move them around in the timeline so that the timing is right in the animation. It's simple, and while getting the timing can be difficult, all it really requires is a knowledge of motion and practice.

So I spaced apart the frames but found that this made the animation too slow. so I went to work with it again.

After working with it again I got this...

The run was still a bit too slow and the kick needs some work as well, so back to work again.


After editing two more times this is what I got...

I'm really happy with this one, I edited the time line 2 more times, but also charged the placement of the landing to make it look more natural.

So after editing the timeline 6 times and the images themselves once, this is the final product.


Tomorrow I think I might use actual drawings to create an animation, instead of using 3D models.

Thursday, October 11, 2018

October 11th, 2018. Program: Clip Studio Paint

So today I plan to work with the frames for the jump and kick part of the animation.

The process of this is easy, just move the model, then duplicate it, put it in the folder, then manipulate the duplicate to continue the motion. The actual hard part was A: getting the motion correct, and B: making sure I either reset the camera view after moving it or typing the camera coordinates back in.

Over all this was just really time consuming, but I did it, I finished the jump and kick frames.

Honestly the screen shot is hilarious, this is with all the frame layers actively visible lol.

Since all of the layers are finished, the next step is to put them in an animation folder. Then edit the frame location in the timeline to make it flow smoothly.

I shall do that tomorrow.

Tuesday, October 9, 2018

October 9th, 2018. Program: Clip Studio Paint

So this post I'll be creating another 3D model animation. First though, a note about the last animation, for you see... I was using the model position and scale editor wrong. So I have figured out that instead of using this to correct the placement of the model, like I did with the last animation. that instead I can use this to sync up the motion of a model, say for example, having a character run across the 3D space and do a jump kick all while trailing it with the view cam. Which is what I'll be trying to do today, should be fun, or annoying.

I needed to use a reference for this, just because of how complex the motion would end up being. Though i won't be mimicking the kick in the video completely.


I decided that this time I'll be creating the key and sub frames at the same time. It takes too long to do the key frames then create the sub frames like I did with the last animation.

It's turning out nicely I've finished the run frames, I'm out of time today so I'll do the key and sub frames for the jump and kick part tomorrow.

Friday, October 5, 2018

October 5th, 2018. Program: Clip Studio Paint

Yesterday I finished the key frames for my jumping model animation. Today I'll be doing the sub frames.

Thursday, October 4, 2018

October 4th, 2018. Program: Clip Studio Paint

So I decided to create a small animation clip of a 3D model jumping.

For this I project I started off by modeling the key frames. In Clip Studio Paint you have to draw every frame separately. So when animating a 3D model I have to change the model's position, the duplicate the model layer, rasterize the duplicate, and put it in an animation folder.

To get the model's placement on the page right, I screen shot'd the model placement and used that as a reference.

I made the mistake of not keeping a copy of the actual model layer. So once I started working on the sub frames, I had to redo the 3D model key pose then model it to the pose the sub frame needed to be in. This turned out to be way too difficult. So I had to restart, it was very annoying.


Refinished the key frames, I'll use those to make the sub frames tomorrow.


Wednesday, October 3, 2018

October 3rd, 2018. Program: Clip Studio Paint

So I redid the back view shadows that I deleted like an idiot yesterday.


I found the shading was too light of a color so I used tonal correction to make it darker.


I also started the second shading set, for this section I'm using the first layer as a selection layer then adding gradients to make the shadows have more depth. I've never tried this before so it should be interesting.

Firstly I added a darker gradient to the shadows. Then I used a lighter gradient, to have the shadows blend into the original color of the non shadowed areas. After that I added highlights to any areas they would be needed. Which ended up being the hair and the boots.

Trying out this style of shading was definitely worth it. It gave the character a lot more depth, though it also added more work.

I had some issues with the layering, also when using the gradient tool I can only add gradients in straight lines so I had to swap out for the air brush tool with some of the shading.

 With this drawing finished I'll be doing an animation starting tomorrow.

Tuesday, October 2, 2018

October 2nd, 2018. Program: Clip Studio Paint


So using this video and some reference images, I'm
working on the shadows and high lights of the hair.


First I just used the pencil tool to roughly color in were I thought the shadows would be. Then I lowered the opacity of that layer. Adding another layer I use the lighter layer as a reference in doing a more finely done shadows.


So I finished the shadows for the front view of the character, get half way through the shadows on the back facing view. Only to realize that when changing the layers, I deleted the layer that had the front facing shadows. To fix this I copied the work I'd down on the back view and opened the action history panel. It wouldn't let me recover the information. So I had to close the drawing with out saving and reopen it, hoping to god that I had saved the front facing shadows. Thankfully I save the progress in the front view, in the proccess of that though I messed up and lost the back view shadows, like an idiot. A lesson to all artists, LABEL YOUR LAYERS!!!!!


So I only made progress on the front view, I'll redo the back view tomorrow.


Monday, October 1, 2018

October 1st, 2018. Program: Clip Studio Paint

For this month I'll be using the art and animation program Clip Studio Paint. I wand to use this program

I'm starting with a character design, since I have the line art finished already. I'll be coloring it and doing the shading and highlights. I do most of my art digitally, with a Wacom Intuos drawing tablet.

I usually start my coloring process by filling in the lines with a darker solid color. This time I'm using dark green. To make things easier, I've learned to draw the green along the edge of the line art's inside, then use the selection tool to fill inside that.


I had a bit of trouble deciding the color scheme for this character, but I chose to go with blue as a base tone. I had trouble getting the right shade for the separate parts of the boots, but I figured out that changing the base color to a more purple shade helped to differentiate the different colors.


I wasn't a big fan of the colors chosen. So I had to use the tonal correction menu to change up the colors a bit.


I'm not sure how to shade and add highlights to silver hair. So next blog I'll be watching this video, of someone else shading and highlighting silver hair. Then I'll do it myself, along with the rest of the shading and highlights. I may also add a texture to the shirt.


      This
           ⬊