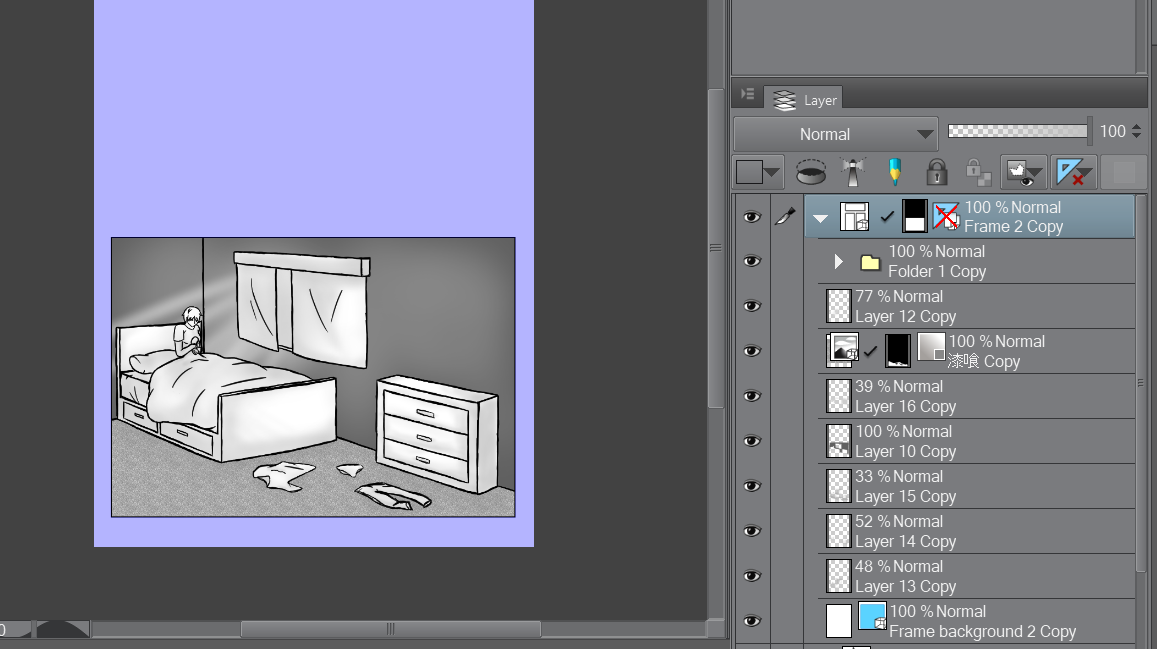
So right back to work on page 2, I moved the coffee cup image to page 3 using the copy paste tools. I had a bit of trouble with this though. I could move the drawing itself but not the masking layer created by the comic frame border tool. With a bit of experimentation I found the solution. The move object tool, apparently. I still had to move both the image and mask layer separately though.
I finished the lines and shading for the image, I want to add some text though. None of the fonts I have suit the character's feeling though, it ends up a goofy contrast to the character. So I'm going to the internet.
I found this site and font that I think will work so going to try and use that. I'm out of time for today though so I'll do that tomorrow.
Tuesday, November 13, 2018
Friday, November 9, 2018
November 9th, 2018. Project: Create A Webtoon
So back to the second image on page 2. I did the line work pretty easily, I had to use the mesh transformation tool on the arms. I found something new while using it. If you have the tool settings panel open while using it, you can increase the number of points you can manipulate in the mesh.
I don't really like how suddenly we move away from the first story scene so I'm moving the cup image to page 3 using copy and paste, and I'll be drawing another image of the character. I've done the base sketch already. I've run out of time to work today so I'll continue on that tomorrow.
Thursday, November 8, 2018
November 8th, 2018. Project: Make A Webtoon
Alright continuing page 2... I just want to quickly compare my sketch vs the final line art because I am impressed with how it develops.
I found the short cut for opening a selected story page in a new tab: N, it's the N key. I also found a new selection thing while experimenting with the layers. You right click a layer, go to the selection button, and you can create a selection from the layers contents as well as add to that selection with another layers contents, it's super useful.I finished the shading on the first panel and I'm still deciding whether I want to add another image to this page.
I decided to do a panel transition, which is a transition between scenes using multiple small empty panels. I also chose to start the next scene with a zoom in on the main characters hands on a coffee cup. On the next page I'll do a far view of the character eating breakfast. I'm really happy with how the sketch of the hands are turning out. They are still really difficult to draw, I'm getting better though.I think this is where I'll stop for today
Wednesday, November 7, 2018
November 7th, 2018. Project: Make A Webtoon
So I just realized that I actually haven't said the name of the story or posted the URL to the blog. So here is that... https://www.webtoons.com/en/challenge/magical-recovery-project/list?title_no=238113 . My story currently has 3 subs and 14 views, which is awesome considering it was just posted yesterday. Webtoon only features series that are already popular on their home page, so for my story to be found it would have to either be specifically searched or one of the keywords related to the story would have to be searched. The search bar on the site will pull up all stories related to what's typed in.

While working with the story I found this cool function of Clip Studio Paint. I can take a page file and make it into an actual story. With that I can add pages that are automatically the same size as all the others; I can go between linked pages, and when a story is saved or opened it does it with every linked file, you can access them separately though. With this I don't have to open and close and reopen the pages to edit them. I just click the page I want then click open page in a new tab. It will show both the entire story, and the page your working with at the same time.
So onto my work with Chapter 2 Page 2, I've done a rough sketch and now I'm working on the details. And I just accidentally discovered a new thing with the story functions, I can drag and drop pages into different orders. I made the character's arm a bit too big so I had to resize that, as well as the annoyance of drawing hands. I finished the line work for page 2, all that's left is the shading.
I noticed today my drawing tablet cord is getting a bit worn down so that might cause problems in the future...

While working with the story I found this cool function of Clip Studio Paint. I can take a page file and make it into an actual story. With that I can add pages that are automatically the same size as all the others; I can go between linked pages, and when a story is saved or opened it does it with every linked file, you can access them separately though. With this I don't have to open and close and reopen the pages to edit them. I just click the page I want then click open page in a new tab. It will show both the entire story, and the page your working with at the same time.
So onto my work with Chapter 2 Page 2, I've done a rough sketch and now I'm working on the details. And I just accidentally discovered a new thing with the story functions, I can drag and drop pages into different orders. I made the character's arm a bit too big so I had to resize that, as well as the annoyance of drawing hands. I finished the line work for page 2, all that's left is the shading.
I noticed today my drawing tablet cord is getting a bit worn down so that might cause problems in the future...
Tuesday, November 6, 2018
November 6th, 2018. Project: Make A Webtoon
So I decided to post the first chapter with the 4 already created pages, so I'm starting page 1 of Chapter 2.
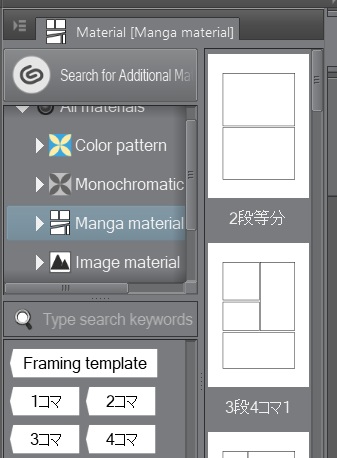
I didn't blog about it last time, but I'm doing the same thing now as I did with the last chapter so now's a good time to write about it. For the images in the comic I'm using Clip Studio Paint's specialized comic panel creation tools. Using these I can either create my own custom panels, which also act as masking layers to anything outside the selected space. Or use pre-made comic pages from the material area. For my webtoon I decided to create my own image panels because this was more suited to the style of webtoons. I experimented with both though.
The pre-made ones were simple to use, you just select the one you want and then drag it onto the project. then you select the image folder you want to use and draw on layers inside it. since it works as a layer mask anything drawn out side of the panel lines won't appear.
With the custom image panels you can basically create panels of any shape that are automatically layer masks. then using other tools you can edit them further. So far I've just used it to create rectangular panels.
For page 1 I wanted to show a distance view of the character before I plan to zoom in on them in page 2. Drawing the room was a little more difficult than I expected, with the perspective as well as the room's coloring and lighting being the hardest parts. I had to create 3 sketches before doing the final line art. I used a downloaded texture for the ground, giving it a carpet appearance. To use the texture I just used the selection tool to specify the area I wanted effected. Then just dragged and dropped the texture from the material palette. Finally I adjusted the color settings and it was finished.
For the rooms lighting I just used the air brush tool again then messed with some of the layers opacity.
Tomorrow I'll work on page 2.
The pre-made ones were simple to use, you just select the one you want and then drag it onto the project. then you select the image folder you want to use and draw on layers inside it. since it works as a layer mask anything drawn out side of the panel lines won't appear.
With the custom image panels you can basically create panels of any shape that are automatically layer masks. then using other tools you can edit them further. So far I've just used it to create rectangular panels.
For page 1 I wanted to show a distance view of the character before I plan to zoom in on them in page 2. Drawing the room was a little more difficult than I expected, with the perspective as well as the room's coloring and lighting being the hardest parts. I had to create 3 sketches before doing the final line art. I used a downloaded texture for the ground, giving it a carpet appearance. To use the texture I just used the selection tool to specify the area I wanted effected. Then just dragged and dropped the texture from the material palette. Finally I adjusted the color settings and it was finished.
For the rooms lighting I just used the air brush tool again then messed with some of the layers opacity.
Tomorrow I'll work on page 2.
Monday, November 5, 2018
November 5th, 2018. Project: Make A Webtoon
I also used the air brush tool to add depth and eye bags.
I started to upload the pages to Webtoon in a project draft, when I previewed it though I realized the start was a bit too sudden. So I added another page at the beginning, just black with the chapter title.
That's all I have time for today, tomorrow I'll add another image to the fourth page.
Friday, November 2, 2018
November 2nd, 2018. Project: Make A Webtoon
So I'll be working on the background for the page and the pages drawing.
Starting with the background, since this first chapter is in a nightmare I want it to have a creepy feel to it so I'll be trying a new tool I downloaded. I downloaded it through Clip Studio's asset store, to download stuff you need to open the separate program that comes with Clip Studio Paint, Clip Studio. Once open you just click on the asset store button, then the asset you want, and click download. It's super simple, I tend to find way too many cool assets using this. For brushes you go to the materials panel in Clip Studio Paint and drag the material to you brush panel then it's ready for use. I'm using a brush that does a gradient thickness crosshatch design.
I think for now since it's the beginning of the story I don't want the details of what happened to the main characters family to be obvious. So for the dream part it will just be text for now.
With that said I finished the first 2 pages so I'll be drawing page 3 next time.
I think for now since it's the beginning of the story I don't want the details of what happened to the main characters family to be obvious. So for the dream part it will just be text for now.
With that said I finished the first 2 pages so I'll be drawing page 3 next time.
Subscribe to:
Posts (Atom)