 I didn't blog about it last time, but I'm doing the same thing now as I did with the last chapter so now's a good time to write about it. For the images in the comic I'm using Clip Studio Paint's specialized comic panel creation tools. Using these I can either create my own custom panels, which also act as masking layers to anything outside the selected space. Or use pre-made comic pages from the material area. For my webtoon I decided to create my own image panels because this was more suited to the style of webtoons. I experimented with both though.
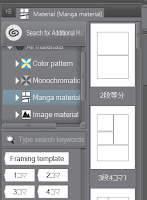
The pre-made ones were simple to use, you just select the one you want and then drag it onto the project. then you select the image folder you want to use and draw on layers inside it. since it works as a layer mask anything drawn out side of the panel lines won't appear.
With the custom image panels you can basically create panels of any shape that are automatically layer masks. then using other tools you can edit them further. So far I've just used it to create rectangular panels.
For page 1 I wanted to show a distance view of the character before I plan to zoom in on them in page 2. Drawing the room was a little more difficult than I expected, with the perspective as well as the room's coloring and lighting being the hardest parts. I had to create 3 sketches before doing the final line art. I used a downloaded texture for the ground, giving it a carpet appearance. To use the texture I just used the selection tool to specify the area I wanted effected. Then just dragged and dropped the texture from the material palette. Finally I adjusted the color settings and it was finished.
For the rooms lighting I just used the air brush tool again then messed with some of the layers opacity.
Tomorrow I'll work on page 2.

No comments:
Post a Comment